Difference between revisions of "DEWBOT XIII Bumpers"
MaiKangWei (talk | contribs) |
MaiKangWei (talk | contribs) |
||
| Line 6: | Line 6: | ||
<gallery widths=250 heights=250 perrow=3> | <gallery widths=250 heights=250 perrow=3> | ||
| − | image:DB13_170219-10.jpg| | + | image:DB13_170219-10.jpg|Bumpers under construction |
| − | image:DB13_170219-18.jpg| | + | image:DB13_170219-18.jpg|Bumpers under construction |
| − | image:DB13_bumper-1.jpg| | + | image:DB13_bumper-1.jpg|Red competition bumpers |
| − | image:DB13_bumper-2.jpg| | + | image:DB13_bumper-2.jpg|Blue competition bumpers |
| − | image:DB13_bumper-3.jpg| | + | image:DB13_bumper-3.jpg|Gwen Moyer & Aashay assemble black practice bumpers |
| − | image:DB13_bumper-4.jpg| | + | image:DB13_bumper-4.jpg|Black practice bumpers on robot |
</gallery> | </gallery> | ||
---- | ---- | ||
[[Category:Robot]][[Category:DEWBOT XIII]][[Category:Photo Galleries]][[Category:Engineering]] | [[Category:Robot]][[Category:DEWBOT XIII]][[Category:Photo Galleries]][[Category:Engineering]] | ||
Revision as of 18:38, 7 May 2017
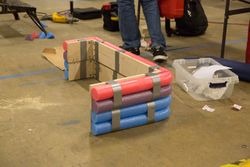
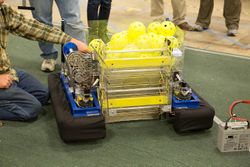
Bumpers fully covered three sides of the robot, with an opening at the fuel intake/gear drop-off position. Due to the low position of bumpers in SteamWorks, bumpers mounted to the lower flange of the chassis frame. An advantage of the bumper's low position is that the bumpers prevented balls (fuel) from getting under the chassis; bumpers pushed fuel away rather than over-riding it.
Bumpers are 2-piece; left & right. They meet in the back and end at the fuel intake gap in the front. Bumpers are secured to the chassis at three points per bumper section; two in back and one in front. Connections are achieved using 1/4"-20 x 1" thumbscrews which engage rivet nuts in the chassis frame.
Three sets of bumpers were made: red competition, blue competition and black practice bumpers. This was our first year for making practice bumpers. The competition bumpers have embroidered team numbers on all four sides.

Bumpers under construction
Bumpers under construction
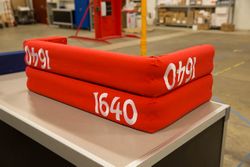
Red competition bumpers
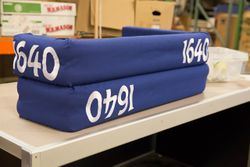
Blue competition bumpers
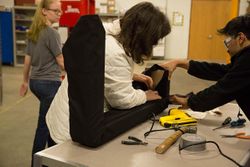
Gwen Moyer & Aashay assemble black practice bumpers
Black practice bumpers on robot


